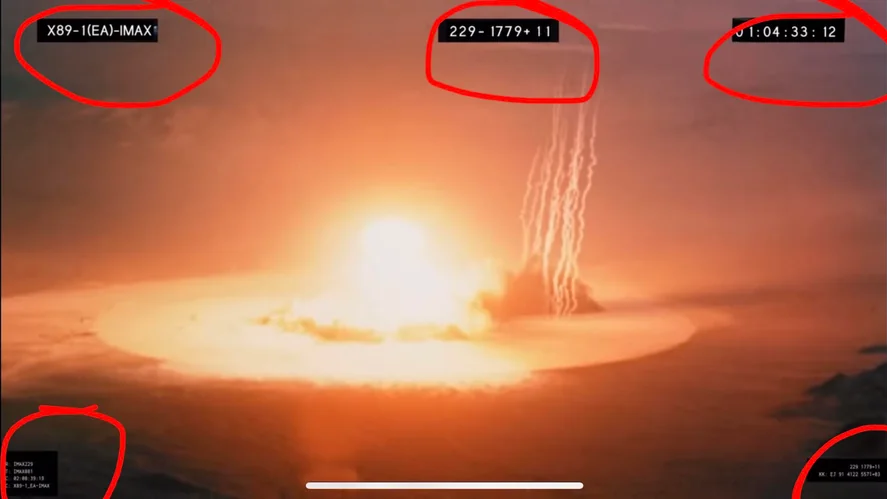
Sometimes in our UE renders we want to add burn-ins to capture some meta info about the shot e.g. timecode. This is useful for reviewing the footage back, but it sometimes can become distracting and hide critical parts of the image, see below:
One solution could be to rescale the rendered output so that it is a smaller resolution than the final video. For example, the video sequence is 1920×1080 but the rendered output is 1796×1010. This will leave enough room to place your burn-in information:
This can’t be done natively inside Unreal, but it can be done easily enough with ffmpeg and command line encoder.
The following article extends an already brilliant article written by Shaun Comly at Epic found here: https://dev.epicgames.com/community/learning/tutorials/BbYV/unreal-engine-how-to-use-ffmpeg-with-the-command-line-encoder-in-movie-render-queue. Please read that first before beginning this article.
Firstly, you need to download ffmpeg. If you don’t know what ffmpeg is, you might want to look it up – it is used extensively in the video processing world. It can be downloaded from here: https://ffmpeg.org/download.html#build-windows
Next, you need to enable the Movie Render Queue plugin in your Plugin Settings and go to the Movie Pipeline CLI Encoding setting in the Project Settings:
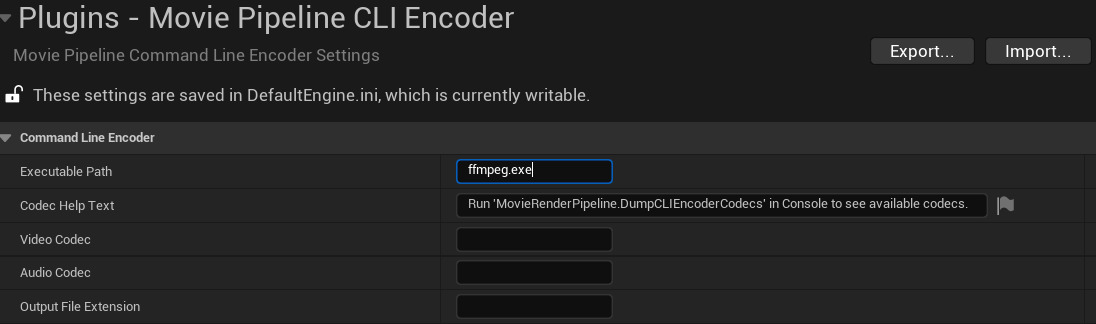
Point the executable path to the location of the ffmpeg.exe file you just downloaded. Alternatively, you can put ffmpeg in your C: drive and add it to your environment variables. There is a great article by Epic on how to do this: https://dev.epicgames.com/community/learning/tutorials/BbYV/unreal-engine-how-to-use-ffmpeg-with-the-command-line-encoder-in-movie-render-queue
Next up is your codec settings. You can use the same as mine:
- Video Codec: libx264
- Audio Codec: aac
- Output File Extension: mp4

For command line settings you can also copy mine:
Command Line Format:
-hide_banner -y -loglevel error {VideoInputs} {AudioInputs} {AdditionalLocalArgs} -acodec {AudioCodec} -vcodec {VideoCodec} {Quality} "{OutputPath}"Video Input String Format / Audio Input String Format:
-f concat -safe 0 -i "{InputFile}"Encode Settings:
- Low: -crf 28
- Med: -crf 23
- High: -crf 20
- Epic: -crf 16

These settings will make sense later on – the Command Line Format is the main argument which is fed to the ffmpeg executable and we fill out AdditionalLocalArgs via our MRQ settings.
Next, go to the MRQ settings and add the Command Line Encoder:
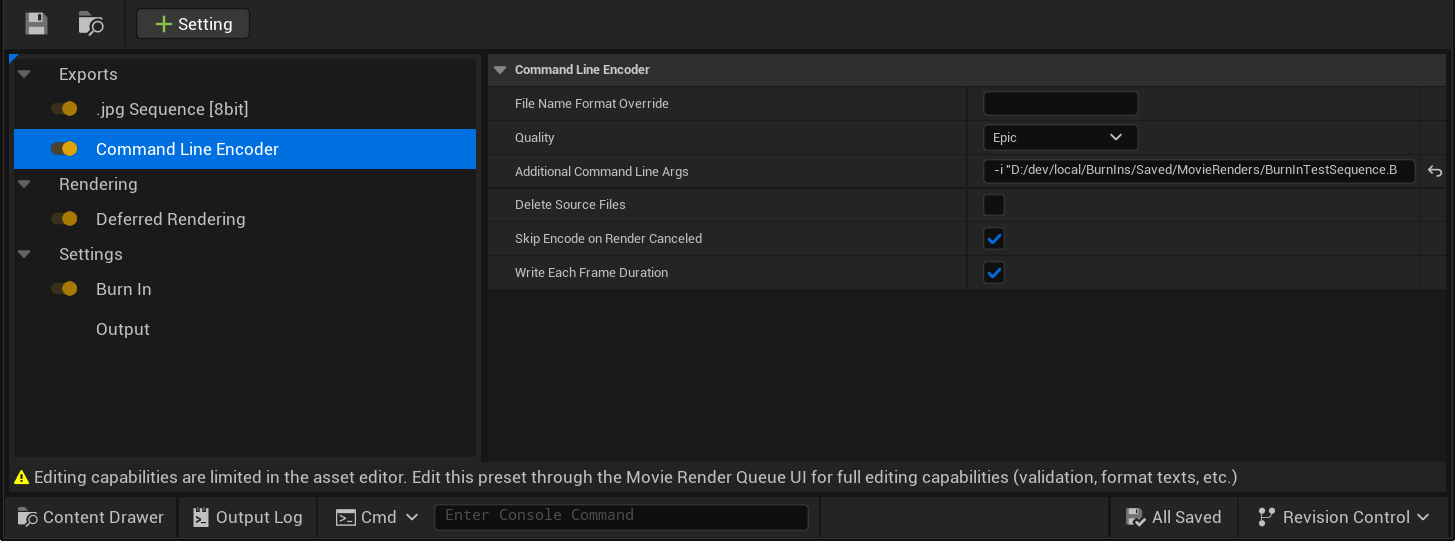
In your Additional Command Line Args, add the following:
-i "BurnInTestSequence.BurnInOverlay.%04d.png" -i "BurnInTestSequence.FinalImage.%04d.jpeg" -filter_complex "[1:v]scale=1796:1010 [ovrl], [0:v][ovrl]overlay=(main_w-overlay_w)/2:(main_h-overlay_h)/2"In the above command, we are using hardcoded filenames for BurnInOverlay and FinalImage – please replace it with the correct filenames used in your project. The above command applies a filter to the FinalImage input – the filter scales the image down to 1796:1010 and overlays it in the center of the frame.
Next, add Burn In to the settings:
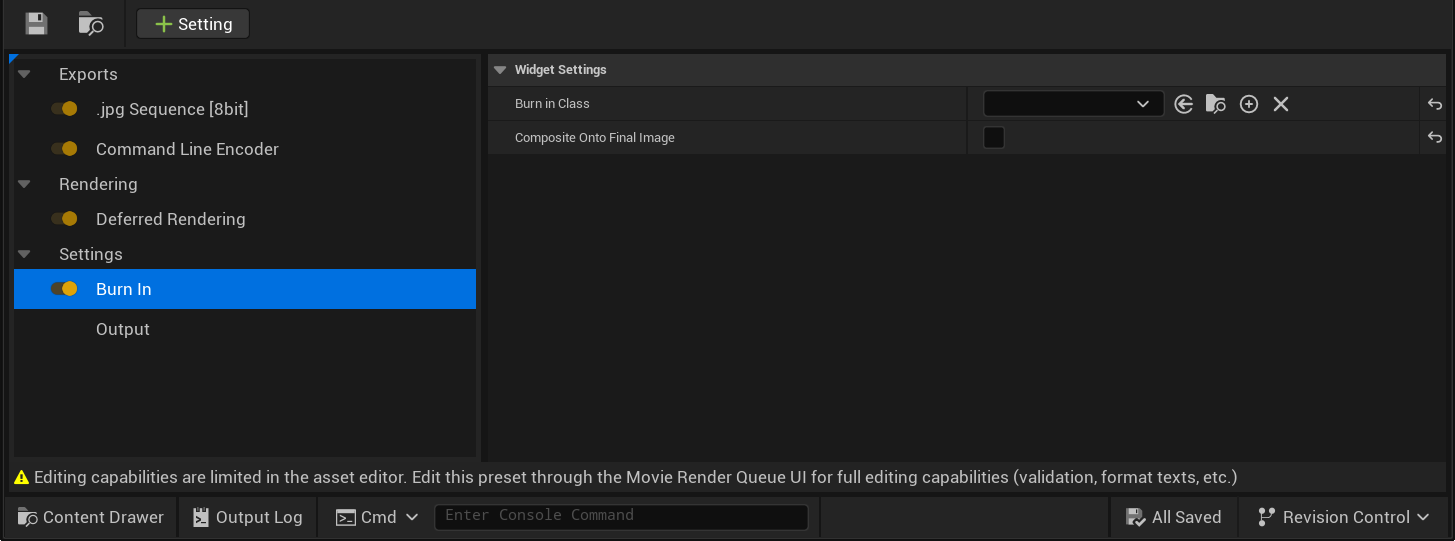
Select your burn-in class Blueprint and make sure to leave Composite Onto Final Image unchecked! This will allow us to generate the BurnInTestSequence.BurnInOverlay image which we use in the ffmpeg comp step.
Finally, we are done! You should now be able to have a rescaled render inside your burn-in without it occluding any of your render.